
You know how you make the bold statement, whether aloud or to yourself, “I’ll never be the type of person that….” whatever your judgy, mcjudgster self swears by the old gods and the new, that you will never do? Then, somehow, you find yourself being/doing the exact thing you said you’d never? For example, I may or may not have said I’d never be that person that blogs about blogging. Yet, here I am, eating a healthy helping of humble pie, wiping the crumbs from my face and licking the remnants off my fingertips, yanno, so it doesn’t get my keys sticky, as I bring you these tips about…yep, blogging.

Here’s the thing, I’ve received so many emails and DMs regarding how to go about starting a blog and how to pitch travel brands. I generally just copy and paste an old email and apologize in advance for things that may not make sense to the new reader because I’m too lazy to go in and modify it to make it look like I actually took the time write out a whole new response specifically for them. Nope. Not doing it. Take what you need and disregard the rest, is essentially my take. But, I figured since I get the question so much, I’ll just take that same email, expound upon it and make it a very detailed blog series to share with the rest of the interwebs and inquiring minds. This is a long one, and packed full of useful information on how to start a travel blog and make money, so be sure to pin this for later.
PIN FOR LATER!

So, you want to start a travel blog and work with brands, reaping all those fabulous travel perks? Or maybe you’ve already started your blog, but want to take it to the next level but you’re not sure where to start. Grab your drink of choice, your favorite notebook to take hella notes and get comfy for this Behemoth of a series, where I’ll spill all the deets and give you no bullsh*t advice on starting a blog and working with brands. Here are the topics I will cover in this series, so stay tuned:
>>> How to Start Your Travel Blog from Scratch <<<
How to Build Your Social Following
How to Successfully Pitch Brands for Travel Perks
Why take my advice?
Well, because I’ve been in this blogging game since 2016. I’m far from a guru, and I am forever a student myself; however, I do know a thing or two that has lead me to collaborate with some pretty awesome brands such as Toyota, Disney, Biltmore, various hotels and tourism boards such as Sarajevo Tourism, Visit Orlando and Ljubljana Tourism, just to name a few. I currently have blog posts ranking on the first page and/or number one on Google. I mean, not to toot my own horn beep beep, but outranking every other website on the world wide web and landing in the number one spot is kind of a big deal.
I have spent countless hours pouring into World of a Wanderer and lots of sleepless nights researching and figuring out all the crap they don’t tell you about starting a blog. It’s a lot of frickin’ work ya’ll! I can’t do the work for you, but I can definitely provide you the resources that will save you a ton of time and help you land opportunities to collaborate with brands.
Getting Started
First, let me just say, blogging isn’t for everybody. Yeah, I know, I know, it seems like everybody and their mama, cousin, and dog has a blog; however, having a blog that’s just an open journal is completely different than having a blog you actually want to profit from. Because, first and foremost, if you don’t love what you do (blogging), then it’s going to feel like work. It won’t be fun and you’re going to hate it and probably give up shortly after starting. And secondly, you can’t just expect to just throw some words on a screen and BAM you’re making thousands of dollars a month. It’s going to take a little bit, no…a lotta bit more work than that. Blogging is typically 20% of the fun stuff, like actually writing, and 80% everything else, i.e. admin, maintenance, promoting, etc. However, with a few strategic steps you can set up a successful and profitable blog. You can be one of the success stories.

Before even embarking on this venture, you have to have the mindset that YOUR BLOG IS YOUR BRAND! Your brand is what people say about you when you’re not in the room. Make sure it speaks well for you. This is a business venture and, from the very beginning, you should treat it as such. Invest the time, energy and money upfront and you won’t have to backtrack in the future to get it to where it needs to be.
Think about what you like to see in a brand as a consumer. Would you be eager to hand your hard earned dollars over to a company/brand that has a website that looks like it was made in 1990 with Comic Sans font and photos taken with a disposable camera that was just printed at the local CVS and scanned to the computer (ahhh that reminds me of my Myspace days)? Chances are, probably not. Presentation is everything! You may not have a gazillion followers yet, and your blog may be less than a year old, but if it is high quality, with high quality content, then you can absolutely partner with brands….speaking from someone that worked with my first brand with only 1,500 Instagram followers and a 10-month old blog. Your blog doesn’t have to be perfect out the gate, but dammit it has to at least be decent.
Ready?! Let’s get into it!
FYI, if you already have a blog set up, then you can skip to the next section. This is for the total newbs that’s starting a travel blog from scratch.
How to set up a Blog
First things first, how do you even go about setting up a blog? Where do you even start? Well my darlings, I have an entire blog post that gives you a step-by-step breakdown on getting your travel blog up and running. It walks you through every single step, from creating a blog name to setting up hosting. But, I’ll give you the Cliff’s Notes version:
Step 1: Choose a Name and a Niche
Choose a name that is fitting, but not limiting. Don’t limit yourself to one country, one age (i.e. The Twenty Something Solo Traveler), one anything unless, you want to be boxed in and have to rebrand a few years down the line when that title no longer suits you. Your niche can be travel, fashion, all things mommy and baby, or if you want to write about a wide range of things, a lifestyle blog would be perfect for you. Just make sure you have separate categories on your blog to make it easy for readers to navigate. Nothing will make readers close out of a site quicker than having to wade through a bunch of stuff they don’t care about to get to what they do care about. So, make it easy for them. Set up categories, i.e. Travel Tips, Destination Guides, Travel Resources etc.
Step 2: Purchase a Domain Name and Hosting

Set up your web hosting with Bluehost, which includes:
– a free domain name
– 1-click WordPress install
– 24/7 support
– AND THE BEST PART OF ALL…plans start at $3.95!
Click Here to Get Started With Bluehost
Step 3: Install WordPress
There are several other platforms, but WordPress.org is the industry standard. It has tons of features that many other platforms don’t have, and it’s just all around more professional.
Step 4: Prettify Your Blog
Purchase or download a free theme for your brand spankin’ new WordPress blog. There are so many different sites where you can purchase WordPress themes, but here are a few of my favorites:
Themeforest (this is where I purchased my theme)
Creative Market
Elegant Themes
Theme Trust
Etsy
Make sure you choose a theme that you actually like and can see yourself having for a while, so you don’t have to go through the rigamarole of changing it over to a new theme, because you’ve decided after 3 months, eh you really don’t like your theme after all.
Above all else, make sure that you choose a theme that is responsive. This is so important, as most people will be viewing your content from their cell phones, so you want to choose a theme that automatically resizes to fit the screen. There is nothing worse than going to an unresponsive website on your phone and having to pinch and slide and scroll just to be able to read the text. Don’t be that person with that website.
![]()
Step 5: Install Plugins
Plugins helps to keep your blog running smoothly and helps attract readers, among a smorgasbord of other things. Check out some of my favorites here.
For the full deets on each of these steps, check out the full blog post on How to Start A Profitable Blog.
Alright, now that you’ve done all the blah, but necessary stuff, it’s time for the good part. Actually creating content!
Here are 3 must-haves you need on your blog before going live:
An About Me Page
People and brands want to know who you are. What you’re about. What prompted you to start this blog on this little corner of the interwebs? Make your about me fun and personable. Show your personality. Talk about the random shit that you think absolutely nobody cares about, like your obsession with Grey’s Anatomy and those surprise military homecomings that make you cry every single time, but you sit watch them anyways. Make sure you have a good photo of yourself, no bathroom selfies with your crusty toothpaste-stained mirror seriously, Windex that thing every now and then. Again, This blog is your brand. You are the face of said brand, so put your best face forward on your About Me.
A Contact Me Page
This is pretty self explanatory. You want to work with brands, but how are they supposed to contact you, without a Contact Me page? This doesn’t have to be anything elaborate, but you should definitely have this set up before going live. Not only is this for brands, to reach out to you, but also your fans and readers who want to leave you a kind message or have questions.
A Few Blog Posts
This is not entirely necessary, and you should NOT delay taking your blog live just because you don’t have a few posts already written. But, it definitely helps! It takes the pressure off, knowing you already have a few posts completed and can just hit the publish button on them. I’d say have at least 5 posts ready to go. If you post once a week, that’s over a month’s worth of content! Even if you post multiple times a week, that’s still a couple of weeks that you don’t have to worry about.
But, Colby, what do I even write about?
So glad you asked, my dear. First, you have to narrow down your audience and create dope content they want to consume. You have your niche, but who is your target audience within that niche? For example, I’m a travel blogger. Affordable travel is my niche; however, my target audience is women solo travelers looking to experience luxe for less. Not male travelers (though, they do read my blog as well), not the super duper luxury travelers (although I do see myself pivoting to this niche in the future), not people traveling with kids. These people are not my target audience; therefore, I don’t write content geared towards them. I mean, what can I tell you about traveling with kids, and I don’t have kids? See, what I mean? So, identify who your target audience is…who will resonate with your posts most, and write content geared towards them.

You will want to write about things that are in alignment with your niche/brand. Whether it’s recipes, travel, dating, whatever, the content on your blog should be content that your readers want to consume. And above all else, your blog should provide value to your readers! Every time you put fingertips to keyboard you should ask yourself, “What will my readers gain from this post?” or “What can they take away from this post?”. Will it provide information? A little humor to brighten their day? Or perhaps enlightenment, offering a different perspective or inspiration? Your post will need to provide some sort of value, because let’s be honest, nobody really cares about your “Dear Diary” posts unless you’re one helluva writer that can keep a reader captivated from start to finish. Providing value means your readers will keep coming back for more. So, think about what can your blog post provide that your reader can’t easily Google and find 262539 of the same exact information. That doesn’t mean you can’t still cover some of the same topics that’s already out there. It just means you need to have a creative spin on it. Add a little personal pizazz. Stand out from the rest.
5 Essential Elements to Creating an Epic Blog Post
Content is king. No if ands or buts about it. What you’re saying needs to captivate your audience and show brands that you can actually string some compelling words together. Your first blog posts may not be all that spectacular, but as with anything, it gets better with practice and consistency. So, what elements should you incorporate for one epic blog post?
#1 A Kick-Ass Blog Title

The very first thing a person is going to see once you hit publish, is the title of the article. It needs to be attention grabbing and makes your reader want to click on it and read it. For example, I recently published a blog post on the cost of living in Mexico. I could have easily named this article, “The Cost of Living in Mérida, Mexico“.
Uhhh, snooze-fest much? It’s dull and boring and most people have probably never even heard of Mérida (I mean, have you?), so they have no interest whatsoever in clicking on this post. There is a flip side to this, when it comes to SEO (a whole other blog post in itself), those boring titles help when it comes to Google searches. So, you have to find your balance and make sure the content within the blog post is SEO optimized. Here is a great resource about SEO basics.
Instead, I titled the article, “How I Saved $1800 a Month by Switching to Mexico”. Now that, my friends, is how you get someone’s attention! Not only is it a play on the popular Geico commercial that everybody and their grandmother knows, but even if a reader has never even considered moving to Mexico, everybody wants to know how they can save money so it entices them to click on the article, if for nothing else than to see just how I am able to save so much money. So, knock your blog title out of the park!
#2 A Killer Intro

Ok, you got them to click on your article, now what? You’ve only got one shot to make an impression. Are you gonna barbecue or mildew?
You’re gonna barbecue, that’s what! Because you’re reading this long a** post on how to be a blogging bawse and it shall not be in vain.
Once someone has landed on your page you’re going to hook them in with a killer first liner and intro. People have the attention spans of a gnat, so if you don’t hook them in right away, chances are you’ve lost them before you’ve even really begun.
Take this intro from a glamping post I wrote:
Thrown to the wiles of the wilderness, left to forage for food and salvage whatever modesty you have left after popping a squat behind a tree. Ahh yes, the beauty of becoming one with nature on an adventurous camping experience. While that may be someone’s idea of a good time, this wanderer prefers a little more comfort and modern conveniences.

I’m painting a picture, setting the reader up for an epic read on glamping. Make sure your intro is captivating and packs a punch and it’ll be a hook, line and sinker on getting the reader to stick around.
#3 Juicy Content
This is the meat and potatoes of your entire blog post. It’s what has brought people to your table. Make sure they leave satisfied and full (of knowledge, inspiration, happiness) and not feeling like they just wasted 10 minutes of their life that they’ll never get back. Make it juicy. Make it valuable. Make them come back for seconds and thirds. Have them asking for tidbits in a to-go box to take on the road, and then run and tell all their friends about it.

#4 Fantastic Photos
Please, for the love of caramel cappuccinos and cute puppies, put a some effort into your photos. You do not have to be a big-shot photographer nor do you have to have a fancy shmancy camera. Work with what you’ve got. The best camera is the one that’s in your hand. Smart phones these days are equipped with awesome cameras and features, learn them and use them if that’s the only camera you have.

CHECK OUT MY AMAZON SHOP FOR MY MUST-HAVE TRAVEL PHOTOGRAPHY GEAR
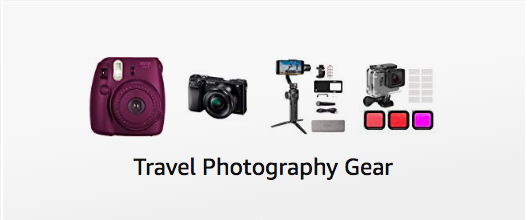
I cannot stress this enough, having a polished website with quality photos will make you look like a pro, even if you just launched yesterday. Do not post under exposed (too dark) photos, blown out (too bright photos), crooked photos, and dear God if you post blurry photos, you may as well just go ahead and throw the whole blog away. Your blog is your brand. Your brand is your business. You want to post only the best of the best. If you have to convince yourself that “it’s not that bad“, don’t post it, fam.
There are tons of apps and programs that can help you take your photos up a notch. A few of my faves are:
VSCO (free) This app gives you that nice vintage photo look. It’s free, but definitely worth the upgrade to gain access to more filter.
Lightroom ($9.99/month with Adobe Creative Cloud) This is my go to, whether using my laptop or the Lightroom App. I can quickly adjust the exposure, shadows, and throw on a filter.
Photoshop Fix (free) I love this app for touch ups. I can remove any blemishes, use the liquify tool if needed, basically just smooth everything out for a nice, natural, finished look.
Snapseed (free) Another free app that allows you to quickly and easily edit your photos.
There is not one photo that I post on my blog or social media platforms that does not get edited in some capacity, whether that’s brightening it just a smidge or sharpening it for a crisper cleaner look. It is time consuming, but it is well worth it in the end.

If photos just really aren’t your thing, then opt for stock photos instead. This is an excellent way to display high quality photos. Some of my favorite websites for free stock photos are:
Unsplash
Nappy.co (stock photos for people of color)
Pexels
When I first starting pitching brands, ten months into my blogging journey, I had probably less than 20 blog posts on my blog. But, the content I did have was high quality and visually appealing. Each time I got a response the brand would comment on how much they loved my website, the cleanliness of it and the photos. So, no matter how small your numbers are, how new your blog is, presentation matters and it’s what can get you in the door, when your numbers won’t.
#5 A Call-to-Action
When concluding your blog post, you always always want to include a call-to-action or CTA. This can be a question for your readers to answer to build engagement, or something as simple as telling them to pin your post on Pinterest or share the post on social media. You can have them subscribe to your mailing list or even offer other related reading that you think they may like, based on the post they just read. Whatever the case may be, make sure the action you want them to take is clear and concise.
PIN ME!

Whew! Ok, if you’ve made it this far, kudos to you! Give yourself a pat on the back or pour yourself a celebratory drink. You deserve it! This is a lot of information to digest, but all are very necessary steps to get you on your way to being a blogging bad ass that’s collaborating with brands in no time!
Want to the blueprint for pitching brands? Get my actual pitch templates here!
Was this post helpful? Pin it for later!

jennifer jones
Awesome – thank you! looking forward to this series!!